I'm sure you will have noticed the new Google design as covered in the post Evolving the Google design and experience on the official Google blog.While the changes have been subtle some stand out like the new sleek search bar on results pages.The new search bar has a more modern minimalist look with rounded corners and hover effect.But one new feature i quiet like is as you type your text into the search field an X appears than can be clicked to remove your text.Yes it's nothing major but still a neat feature none the less.So in this post i will show you how you can re-create the new Google search bar and use it on your blog.
Once on your blog it will look the very same, using jQuery for the X delete button and your blogs default search to generate results.This was covered on the Awesome Queness.Com design blog and with just a few changes i have it ready to go For Blogger.
Lets look at some screenshots and the live demo :
On Google

Remember Always Back Up Your Template Before You Make Changes - How To Back Up A Blogger Template
Step 1. In Your Blogger Dashboard Click Design > Edit Html

Step 2. Find the following piece of code in your blogs Html : (Click Ctrl and F for a search bar to help find the code - How To Find Code In Blogger Template Template)
-Scroll Box Make Sure To Get All The Code.
Step 4. Find the following piece of code in your blogs Html : (Click Ctrl and F for a search bar to help find the code - How To Find Code In Blogger Template Template)
Note - If you have previously added jQuery script to your template you can remove the code highlighted in green.

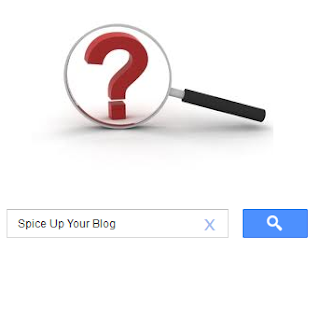 I'm sure you will have noticed the new Google design as covered in the post Evolving the Google design and experience on the official Google blog.While the changes have been subtle some stand out like the new sleek search bar on results pages.The new search bar has a more modern minimalist look with rounded corners and hover effect.But one new feature i quiet like is as you type your text into the search field an X appears than can be clicked to remove your text.Yes it's nothing major but still a neat feature none the less.So in this post i will show you how you can re-create the new Google search bar and use it on your blog.
Once on your blog it will look the very same, using jQuery for the X delete button and your blogs default search to generate results.This was covered on the Awesome Queness.Com design blog and with just a few changes i have it ready to go For Blogger.
Lets look at some screenshots and the live demo :
On Google

On Blogger

On the demo page i have it wide across the top of the posts but you can also easily make it smaller to fit nicely into your sidebar.If you want to actually try it just search for one of the recent posts you can see in the sidebar of that blog.

Remember Always Back Up Your Template Before You Make Changes - How To Back Up A Blogger Template
Step 1. In Your Blogger Dashboard Click Design > Edit Html
Step 2. Find the following piece of code in your blogs Html : (Click Ctrl and F for a search bar to help find the code - How To Find Code In Blogger Template Template)
Step 3. Copy and Paste the following code Directly Above / Before ]]></b:skin>
-Scroll Box Make Sure To Get All The Code.
Note - To change the width of the search bar simply change the line highlighted in yellow from 200px up or down.
Step 4. Find the following piece of code in your blogs Html : (Click Ctrl and F for a search bar to help find the code - How To Find Code In Blogger Template Template)
Step 5. Now Copy And Paste This Code Directly Above / Before </head>
Note - If you have previously added jQuery script to your template you can remove the code highlighted in green.
Step 6. Save your template, we have the Css added to style the search bar and the jQuery for the X button now we add the html.
Step 7. Head back to your blogs design page and click Add A Gadget > Choose Html/Javascript.

Step 8. Copy and Paste the following code into the Html/Javascript gadget :
Step 9. Save the html/javascript gadget and you can drag and drop it into place.
Once on your blog it will look the very same, using jQuery for the X delete button and your blogs default search to generate results.This was covered on the Awesome Queness.Com design blog and with just a few changes i have it ready to go For Blogger.
Lets look at some screenshots and the live demo :
On Google

Add The New Google Style Search Bar To Blogger
Remember Always Back Up Your Template Before You Make Changes - How To Back Up A Blogger Template
Step 1. In Your Blogger Dashboard Click Design > Edit Html
Step 2. Find the following piece of code in your blogs Html : (Click Ctrl and F for a search bar to help find the code - How To Find Code In Blogger Template Template)
]]></b:skin>Step 3. Copy and Paste the following code Directly Above / Before ]]></b:skin>
-Scroll Box Make Sure To Get All The Code.
Note - To change the width of the search bar simply change the line highlighted in yellow from 200px up or down.
/*Start Css For Google Style Search Box*/
/* div container containing the form */
#searchContainer {
margin:20px;
}
/* Style the search input field. */
#field {
float:left;
width:200px;height:27px;
line-height:27px;
text-indent:10px;
font-family:arial, sans-serif;
font-size:1em;
color:#333;
background: #fff;
border:solid 1px #d9d9d9;
border-top:solid 1px #c0c0c0;
border-right:none;
}
/* Style the "X" text button next to the search input field */
#delete {
float:left;
width:16px;
height:29px;
line-height:27px;
margin-right:15px;
padding:0 10px 0 10px;
font-family: "Lucida Sans", "Lucida Sans Unicode",sans-serif;
font-size:22px;
background: #fff;
border:solid 1px #d9d9d9;
border-top:solid 1px #c0c0c0;
border-left:none;
}
/* Set default state of "X" and hide it */
#delete #x {
color:#A1B9ED;
cursor:pointer;
display:none;
}
/* Set the hover state of "X" */
#delete #x:hover {
color:#36c;
}
/* Syle the search button. Settings of line-height, font-size, text-indent used to hide submit value in IE */
#submit {
cursor:pointer;
width:70px;
height: 31px;
line-height:0;
font-size:0;
text-indent:-999px;
color: transparent;
background: url(https://blogger.googleusercontent.com/img/b/R29vZ2xl/AVvXsEh2EpHhf9c4zb3GMc7uXeQd4bwQEYMp9U8YFNN_elfPskb_N1iz97fYCdoRUc8bHxVEZcMcb8c-YGQekafnYIAfmOnXwSJd_RQGDOtETkq1SuCoK_D76BGKtNY4uHFVtaso23poP-6-ATQG/s1600/ico-search.png) no-repeat #4d90fe center;
border: 1px solid #3079ED;
-moz-border-radius: 2px;
-webkit-border-radius: 2px;
}
/* Style the search button hover state */
#submit:hover {
background: url(https://blogger.googleusercontent.com/img/b/R29vZ2xl/AVvXsEh2EpHhf9c4zb3GMc7uXeQd4bwQEYMp9U8YFNN_elfPskb_N1iz97fYCdoRUc8bHxVEZcMcb8c-YGQekafnYIAfmOnXwSJd_RQGDOtETkq1SuCoK_D76BGKtNY4uHFVtaso23poP-6-ATQG/s1600/ico-search.png) no-repeat center #357AE8;
border: 1px solid #2F5BB7;
}
/* Clear floats */
.fclear {clear:both}
/*End Google Style Search Bar - Info @ http://www.olantinowap.blogspot.com*/
Step 4. Find the following piece of code in your blogs Html : (Click Ctrl and F for a search bar to help find the code - How To Find Code In Blogger Template Template)
</head>Step 5. Now Copy And Paste This Code Directly Above / Before </head>
Note - If you have previously added jQuery script to your template you can remove the code highlighted in green.
<script src='http://code.jquery.com/jquery-1.6.1.min.js' type='text/javascript'/><script type='text/javascript'>
$().ready(function() {
// if text input field value is not empty show the "X" button
$("#field").keyup(function() {
$("#x").fadeIn();
if ($.trim($("#field").val()) == "") {
$("#x").fadeOut();
}
});
// on click of "X", delete input field value and hide "X"
$("#x").click(function() {
$("#field").val("");
$(this).hide();
});
});
</script>
Awesome New Google Search Style Search Bar For Blogger
I'm sure you will have noticed the new Google design as covered in the post Evolving the Google design and experience on the official Google blog.While the changes have been subtle some stand out like the new sleek search bar on results pages.The new search bar has a more modern minimalist look with rounded corners and hover effect.But one new feature i quiet like is as you type your text into the search field an X appears than can be clicked to remove your text.Yes it's nothing major but still a neat feature none the less.So in this post i will show you how you can re-create the new Google search bar and use it on your blog.Once on your blog it will look the very same, using jQuery for the X delete button and your blogs default search to generate results.This was covered on the Awesome Queness.Com design blog and with just a few changes i have it ready to go For Blogger.
Lets look at some screenshots and the live demo :
On Google
On Blogger
On the demo page i have it wide across the top of the posts but you can also easily make it smaller to fit nicely into your sidebar.If you want to actually try it just search for one of the recent posts you can see in the sidebar of that blog.
Add The New Google Style Search Bar To Blogger
Remember Always Back Up Your Template Before You Make Changes - How To Back Up A Blogger Template
Step 1. In Your Blogger Dashboard Click Design > Edit Html
Step 2. Find the following piece of code in your blogs Html : (Click Ctrl and F for a search bar to help find the code - How To Find Code In Blogger Template Template)
]]></b:skin>
Step 3. Copy and Paste the following code Directly Above / Before ]]></b:skin>
-Scroll Box Make Sure To Get All The Code.
/*Start Css For Google Style Search Box*/
/* div container containing the form */
#searchContainer {
margin:20px;
}
/* Style the search input field. */
#field {
float:left;
line-height:27px;
text-indent:10px;
font-family:arial, sans-serif;
font-size:1em;
color:#333;
background: #fff;
border:solid 1px #d9d9d9;
border-top:solid 1px #c0c0c0;
border-right:none;
}
/* Style the "X" text button next to the search input field */
#delete {
float:left;
width:16px;
height:29px;
line-height:27px;
margin-right:15px;
padding:0 10px 0 10px;
font-family: "Lucida Sans", "Lucida Sans Unicode",sans-serif;
font-size:22px;
background: #fff;
border:solid 1px #d9d9d9;
border-top:solid 1px #c0c0c0;
border-left:none;
}
/* Set default state of "X" and hide it */
#delete #x {
color:#A1B9ED;
cursor:pointer;
display:none;
}
/* Set the hover state of "X" */
#delete #x:hover {
color:#36c;
}
/* Syle the search button. Settings of line-height, font-size, text-indent used to hide submit value in IE */
#submit {
cursor:pointer;
width:70px;
height: 31px;
line-height:0;
font-size:0;
text-indent:-999px;
color: transparent;
background: url(https://blogger.googleusercontent.com/img/b/R29vZ2xl/AVvXsEh2EpHhf9c4zb3GMc7uXeQd4bwQEYMp9U8YFNN_elfPskb_N1iz97fYCdoRUc8bHxVEZcMcb8c-YGQekafnYIAfmOnXwSJd_RQGDOtETkq1SuCoK_D76BGKtNY4uHFVtaso23poP-6-ATQG/s1600/ico-search.png) no-repeat #4d90fe center;
border: 1px solid #3079ED;
-moz-border-radius: 2px;
-webkit-border-radius: 2px;
}
/* Style the search button hover state */
#submit:hover {
background: url(https://blogger.googleusercontent.com/img/b/R29vZ2xl/AVvXsEh2EpHhf9c4zb3GMc7uXeQd4bwQEYMp9U8YFNN_elfPskb_N1iz97fYCdoRUc8bHxVEZcMcb8c-YGQekafnYIAfmOnXwSJd_RQGDOtETkq1SuCoK_D76BGKtNY4uHFVtaso23poP-6-ATQG/s1600/ico-search.png) no-repeat center #357AE8;
border: 1px solid #2F5BB7;
}
/* Clear floats */
.fclear {clear:both}
/*End Google Style Search Bar - Info @ http://www.spiceupyourblog.com*/
/* div container containing the form */
#searchContainer {
margin:20px;
}
/* Style the search input field. */
#field {
float:left;
width:200px;
height:27px;line-height:27px;
text-indent:10px;
font-family:arial, sans-serif;
font-size:1em;
color:#333;
background: #fff;
border:solid 1px #d9d9d9;
border-top:solid 1px #c0c0c0;
border-right:none;
}
/* Style the "X" text button next to the search input field */
#delete {
float:left;
width:16px;
height:29px;
line-height:27px;
margin-right:15px;
padding:0 10px 0 10px;
font-family: "Lucida Sans", "Lucida Sans Unicode",sans-serif;
font-size:22px;
background: #fff;
border:solid 1px #d9d9d9;
border-top:solid 1px #c0c0c0;
border-left:none;
}
/* Set default state of "X" and hide it */
#delete #x {
color:#A1B9ED;
cursor:pointer;
display:none;
}
/* Set the hover state of "X" */
#delete #x:hover {
color:#36c;
}
/* Syle the search button. Settings of line-height, font-size, text-indent used to hide submit value in IE */
#submit {
cursor:pointer;
width:70px;
height: 31px;
line-height:0;
font-size:0;
text-indent:-999px;
color: transparent;
background: url(https://blogger.googleusercontent.com/img/b/R29vZ2xl/AVvXsEh2EpHhf9c4zb3GMc7uXeQd4bwQEYMp9U8YFNN_elfPskb_N1iz97fYCdoRUc8bHxVEZcMcb8c-YGQekafnYIAfmOnXwSJd_RQGDOtETkq1SuCoK_D76BGKtNY4uHFVtaso23poP-6-ATQG/s1600/ico-search.png) no-repeat #4d90fe center;
border: 1px solid #3079ED;
-moz-border-radius: 2px;
-webkit-border-radius: 2px;
}
/* Style the search button hover state */
#submit:hover {
background: url(https://blogger.googleusercontent.com/img/b/R29vZ2xl/AVvXsEh2EpHhf9c4zb3GMc7uXeQd4bwQEYMp9U8YFNN_elfPskb_N1iz97fYCdoRUc8bHxVEZcMcb8c-YGQekafnYIAfmOnXwSJd_RQGDOtETkq1SuCoK_D76BGKtNY4uHFVtaso23poP-6-ATQG/s1600/ico-search.png) no-repeat center #357AE8;
border: 1px solid #2F5BB7;
}
/* Clear floats */
.fclear {clear:both}
/*End Google Style Search Bar - Info @ http://www.spiceupyourblog.com*/
Note - To change the width of the search bar simply change the line highlighted in yellow from 200px up or down.
Step 4. Find the following piece of code in your blogs Html : (Click Ctrl and F for a search bar to help find the code - How To Find Code In Blogger Template Template)
</head>
Step 5. Now Copy And Paste This Code Directly Above / Before </head>
Note - If you have previously added jQuery script to your template you can remove the code highlighted in green.
<script src='http://code.jquery.com/jquery-1.6.1.min.js' type='text/javascript'/><script type='text/javascript'>
$().ready(function() {
// if text input field value is not empty show the "X" button
$("#field").keyup(function() {
$("#x").fadeIn();
if ($.trim($("#field").val()) == "") {
$("#x").fadeOut();
}
});
// on click of "X", delete input field value and hide "X"
$("#x").click(function() {
$("#field").val("");
$(this).hide();
});
});
</script>
Step 6. Save your template, we have the Css added to style the search bar and the jQuery for the X button now we add the html.
Step 7. Head back to your blogs design page and click Add A Gadget > Choose Html/Javascript.
Step 8. Copy and Paste the following code into the Html/Javascript gadget :
<div id="searchContainer">
<form name="SUYB" action="/search" method="get">
<input type="text" id="field" id="s" name="q"/>
<div id="delete"><span id="x">x</span></div>
<input type="submit" name="submit" id="submit" value="Search" />
</form>
</div>
Step 9. Save the html/javascript gadget and you can drag and drop it into place.